
PC benchmarks and stability tests with a Ryzen 7 9700X and RTX 5070
After building the computer and installing CUDA, I wanted to verify something more basic but essential: whether the GPU could perform under load, whether the processor showed immediate calculation errors, and whether Windows correctly recognized the installed memory and devices.
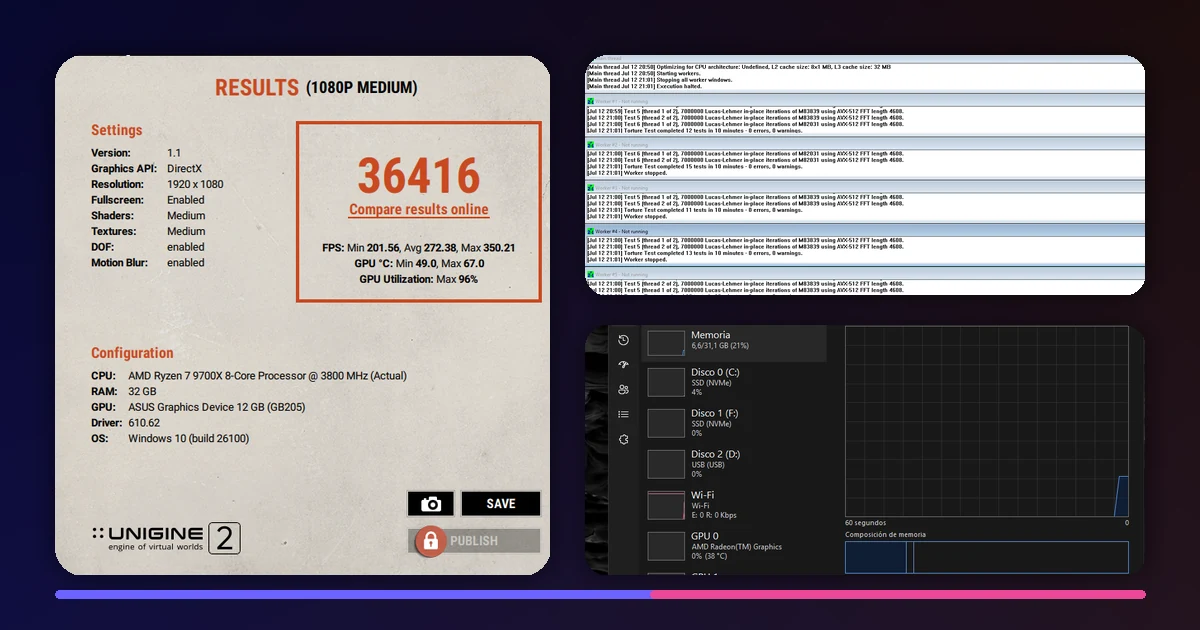
01 The computer I tested
The goal was not to overclock the computer or chase a record. I wanted an initial practical validation of a workstation designed for data science, deep learning, web development, music production and gaming.
02 Method: what I did and observed
- I closed unnecessary applications and checked that Windows recognized the CPU, GPU, memory and storage devices.
- I used Wise Disk Cleaner to remove temporary files and caches. I treat this as maintenance, not as a way to artificially increase a score.
- I ran Unigine Superposition at 1080p Medium to apply a graphics workload and record FPS, utilization and GPU temperature.
- I ran Prime95 for approximately ten minutes as a quick test for immediate processor errors.
- I checked Task Manager to document memory, frequency, dedicated and integrated GPUs, and detected storage.
03 Superposition: RTX 5070 graphics performance
Superposition renders a complex 3D scene and keeps the GPU under a high workload. I used DirectX, fullscreen mode, a 1920 × 1080 resolution and the Medium preset.
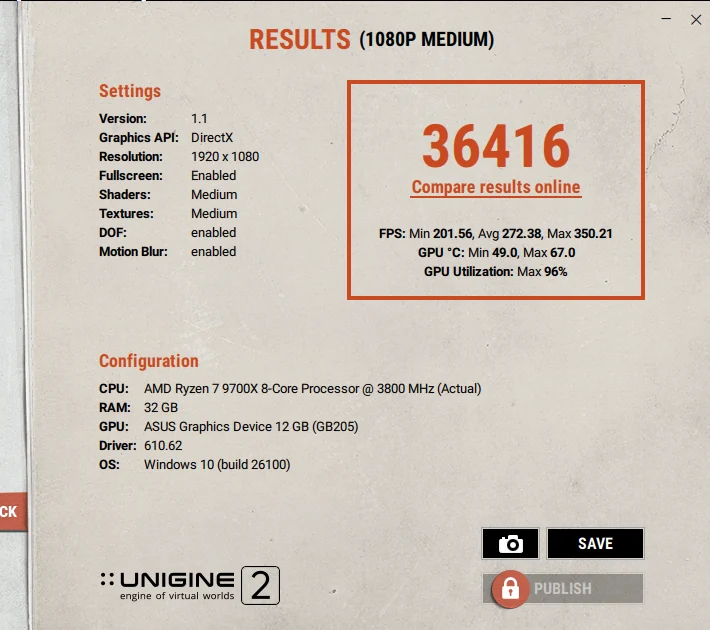
The test completed successfully and pushed the RTX 5070 to 96% utilization. The most useful thermal result was the 67 °C maximum: during this run, the cooling system kept the card well away from a concerning temperature.
1080p Medium produces a very high frame rate and is not the most demanding scenario for an RTX 5070. A second run at 1080p Extreme or 4K Optimized would be more useful for comparing graphics performance and reducing a possible CPU limitation.
04 Prime95: a quick processor test
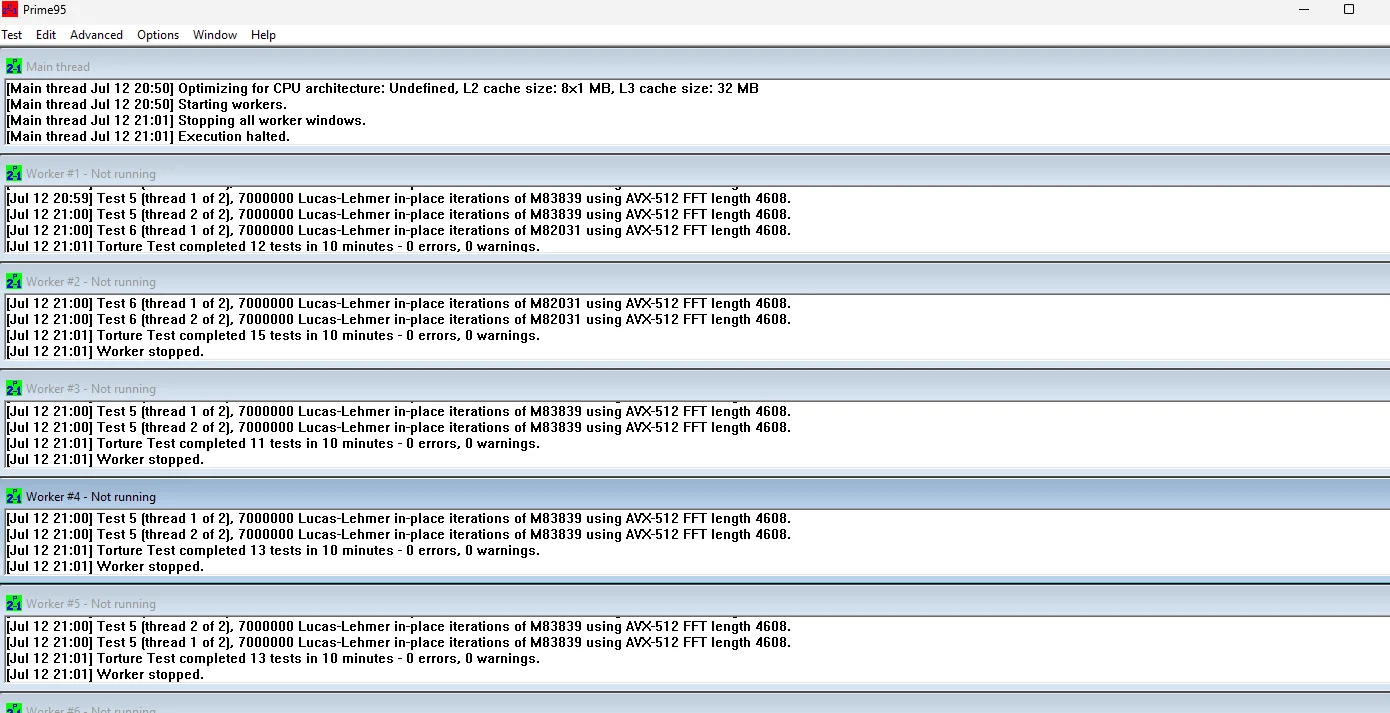
Prime95 performs intensive calculations and can reveal CPU or memory errors that do not always appear during normal use. This time I ran it for approximately ten minutes.
| Item | Observed result |
|---|---|
| Duration | Approximately 10 minutes |
| Errors | 0 |
| Warnings | 0 |
| End of test | Stopped manually |
| Test mode | Not recorded in the screenshot |
The accurate conclusion is that the Ryzen 7 9700X passed a quick test without immediate errors. Ten minutes do not guarantee stability over long sessions or every possible workload.
05 Task Manager: recognized hardware and memory usage
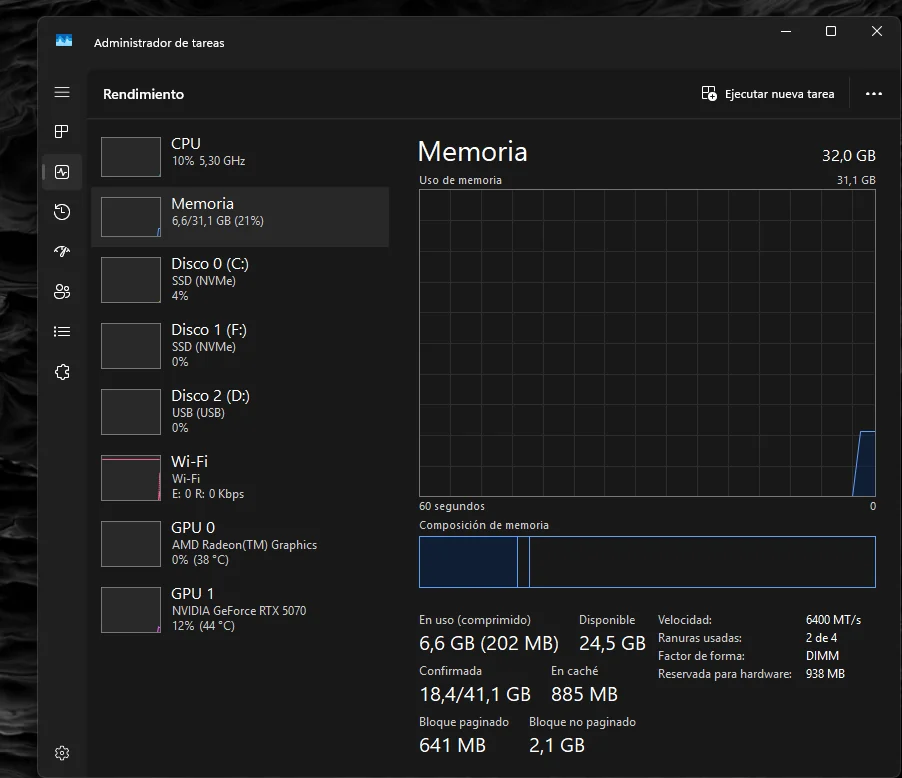
Task Manager does not replace a specialized monitoring tool, but it is a quick way to verify that Windows recognizes the main components.
| Component | Screenshot data |
|---|---|
| Installed memory | 32.0 GB |
| Usable memory | 31.1 GB |
| Usage at that moment | 6.6 GB, or 21% |
| Memory speed | 6400 MT/s |
| Slots used | 2 of 4 |
| CPU in the screenshot | 10% at 5.30 GHz |
| RTX 5070 in the screenshot | 12% and 44 °C |
| Integrated GPU | AMD Radeon Graphics, 38 °C |
The memory is shown running at 6400 MT/s and both graphics adapters are detected. Three storage devices are also visible. This check is useful for documenting the configuration, but it is not a benchmark by itself.
06 Wise Disk Cleaner: maintenance, not benchmarking
I used Wise Disk Cleaner to remove temporary files and caches while organizing the system. This step does not measure processor or graphics performance, nor does it make the benchmark inherently more valid. Its purpose was simply to recover space and keep Windows tidy.
I limited the cleanup to temporary files. I do not consider aggressive registry cleaning necessary for performance testing: a benchmark should mainly depend on hardware, drivers, configuration and test conditions.
07 Conclusion: what the tests showed
These checks provide positive initial evidence of performance, cooling and general operation. They also show why documenting the exact configuration matters: without a preset, duration, temperature and mode, an isolated number has limited technical value.
My next step is to repeat the graphics test with a more demanding preset, log sensors with HWiNFO and extend the stability test. That will make it possible to compare results over time and detect changes after BIOS, driver or memory-configuration updates.
This is the second part of the project
The first article covers how I built the computer, installed the drivers and got PyTorch to recognize CUDA.
Read how I built the PC and installed CUDA →